
Tire Installation
Proper tire installation is an essential skill for maintaining a bike. Whether it's the ability to fix a flat on the side of the road or to replace your worn out treads with a fresh set, every cyclist needs to know how to change his or her own tires.
Note: Mounting tires and tubes gets easier the more you practice, but proper installation is critical to your safety on the road or trail. Picking up this new task can prove a bit difficult at first, so if you are uncomfortable with any aspect of this walkthrough—don't risk it—please consult a professional bike mechanic.
Removing a Tire

Tires are best removed carefully, and by using your hands. Let all of the air out and wrestle that thing off. Folding bead tires are usually pretty easy to remove - wire beads can be a bit harder. If you can't get it off by hand, slip a tire lever underneath the bead of the tire and bend it outwards, leveraging the tire against the rim. This should create enough space to slip the tire bead over the rim and peel it off.
While tire levers make the job easier, we recommend using them as sparingly as possible. Sliding tire levers along the inside of your tire can damage rims or damage your tube. Tube punctures, caused by road hazards, pinch flatting, or spoke holes, are easily patched. Cuts are usually not patchable, and if you cut your tube without a spare one handy, you'll be out of luck.
If you're fortunate enough to be rolling on a pair of carbon clinchers, avoid tire levers. It's worth the time to find a tire that can be removed by hand. There's no feasible way to repair a carbon rim damaged by a tire lever.
Installing a Tire
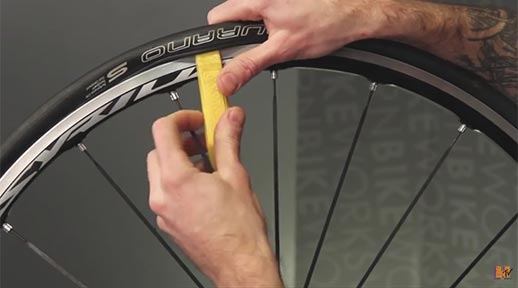
Make sure your rim is properly taped. There should not be any room for the tube to expand into the spoke holes, which can cause flats. A new rim may need to be taped, and an old rim might need new rim tape. There's no need to re-tape a rim with each new tire; properly installed rim tape should last for years. Make sure the rim is clean of debris or sharp bits before continuing.
Next, install one side of the new tire. The bead on one side of the tire should be between the rim "hooks." It does not need to cling to the side of the rim it will reside in yet—inflating the tire will allow the bead to fully "seat." Partially inflate the tube and place it inside the partially installed tire, placing the valve in the valve hole carefully. Finally, gently guide the uninstalled bead into place. This is where it can get a bit tricky.
When installing the second side of the tire, take great care not to puncture the new tube. It is best to hold the "bottom" of the wheel against your stomach with both hands at "12 o'clock" supporting the wheel. Carefully hook the bead into the rim, starting near the valve, and work outward from there, moving each hand around opposite sides of the rim, guiding the bead into place as you go. This will generally go smoothly until the last six inches when the tube will try and squeeze through the last remaining opening between the tire and rim. It is tempting to use a tire lever to leverage the last bit of bead into the rim—if this is the method you prefer, do it extremely carefully. This is when you may puncture or slash the tube.
Generally, it is best to push the tire into place with your hands. It takes some strength, and the bead of a new tire can require a bit of stretching, but the bead should finally click into place. Before inflating, make sure no sections of tube are caught between the tire bead and the rim—one way to do this is to squeeze all the way around the tire. Finally, carefully inflate the tire making sure that both sides of the bead are properly seating in the rim and no tube is bulging through the tire and inflate to the desired pressure.
Tada! That should do it. When you're fully inflated and have your wheel properly re-installed (get that quick release tight!), roll down the street and back to make sure there is no reason for sudden tire failure. A pinched tube or damaged bead will make itself known immediately, so if your tube lasts through a short test ride, it should be good for the long haul.
Tire Tips
- Dust your tubes with baby powder before installing them to help them seat more easily.
- It is not safe to rotate tires by swapping the front and rear. We suggest discarding a used rear tire, moving the used front to the rear, then putting a new tire on the front. The front wheel is responsible for most of your traction when cornering while the rear supports most of your body weight and facilitates the power transfer caused by pedaling. If a front tire wears out simply replace it. Rear tires wear faster - front tires need traction.
- Tires with black treads will generally last longer than any other color due to their carbon content.
- If a road hazard damages your tire while on a ride, a folded dollar bill or energy bar wrapper can be inserted between the tube and the tire as a makeshift tire boot. Higher quality emergency tire boots are available for those who are always prepared.
- If you're having difficulty mounting a new tire, try using a little hand dish detergent on the tire bead to make it a little more slippery and easier to slide over the rim. Make sure to clean it off before you ride, though, or your tire may be slippery!
As always, if you have any questions, please feel free to contact us at [email protected] or 1-800-651-4050.